SmartOS on Hetzner
Requirements
This how-to uses an inexpensive server from Hetzner with the following hardware:
- Intel Core i7-2600
- 2x HDD 1,5 TB SATA
- 4x RAM 8192 MB DDR3
Additionally, we have ordered a 16GB USB stick.
This hardware costs about €35 per month with setup costs of about €30 in November 2016.
Process
Preparing a SmartOS server is a multistep process:
Create Installation Media
SmartOS boots from a USB stick. The first task is to download SmartOS and copy it to the USB stick.
First, connect to the rescue system using SSH. Once connected, locate the USB flash drive:
-------------------------------------------------------------------

  Welcome to the Hetzner Rescue System.

  This Rescue System is based on Debian 8.0 (jessie) with a newer
  kernel. You can install software as in a normal system.

  To install a new operating system from one of our prebuilt
  images, run 'installimage' and follow the instructions.

  More information at http://wiki.hetzner.de

-------------------------------------------------------------------

Hardware data:

   CPU1: Intel(R) Core(TM) i7-2600 CPU @ 3.40GHz (Cores 8)
   Memory:  32045 MB
   Disk /dev/sda: 1500 GB (=> 1397 GiB) doesn't contain a valid partition table
   Disk /dev/sdb: 1500 GB (=> 1397 GiB) doesn't contain a valid partition table
   Disk /dev/sdc: 15 GB (=> 14 GiB)
   Total capacity 2808 GiB with 3 Disks

Network data:
   eth0  LINK: yes
         MAC:  c8:60:00:
         IP:
         IPv6:
         RealTek RTL-8169 Gigabit Ethernet driver

root@rescue ~ #
We can see that the system has a single processor, 32GB of RAM, two 1.5TB disks and one 16GB USB stick (/dev/sdc).
Next, download the SmartOS USB image and verify the MD5. You can find the MD5 alongside the SmartOS images.
root@rescue ~ # cd /tmp
root@rescue /tmp # curl -L -O https://us-east.manta.joyent.com/Joyent_Dev/public/builds/smartos/release-20161110-20161110T013148Z/smartos//smartos-20161110T013148Z-USB.img.bz2
  % Total    % Received % Xferd  Average Speed   Time    Time     Time  Current
                                   Dload  Upload   Total   Spent    Left  Speed
100  158M  100  158M    0     0  9480k      0  0:00:17  0:00:17 --:--:-- 10.7M
root@rescue /tmp # md5sum smartos-20161110T013148Z-USB.img.bz2 | grep e040957cd48d3f3e05617c24f88bb273 # Using the MD5 found in md5sums.txt on the download site.
e040957cd48d3f3e05617c24f88bb273  smartos-20161110T013148Z-USB.img.bz2
Next, extract the image from the downloaded archive and copy the image to the USB stick. This may take some time.
root@rescue /tmp # bunzip2 smartos-20161110T013148Z-USB.img.bz2
root@rescue /tmp # dd if=smartos-20161110T013148Z-USB.img of=/dev/sdc bs=1024
1953125+0 records in
1953125+0 records out
2000000000 bytes (2.0 GB) copied, 266.249 s, 7.5 MB/s
Finally, mark the only partition on the USB stick as bootable if necessary.
Below, you can see that partition was already marked bootable, so we did not
make any changes. (According to the fdisk help, the a command will
toggle the bootable flag.)
root@rescue /tmp # fdisk /dev/sdc

Welcome to fdisk (util-linux 2.25.2).
Changes will remain in memory only, until you decide to write them.
Be careful before using the write command.


Command (m for help): p
Disk /dev/sdc: 14.5 GiB, 15536226304 bytes, 30344192 sectors
Units: sectors of 1 * 512 = 512 bytes
Sector size (logical/physical): 512 bytes / 512 bytes
I/O size (minimum/optimal): 512 bytes / 512 bytes
Disklabel type: dos
Disk identifier: 0x00000000

Device     Boot Start     End Sectors  Size Id Type
/dev/sdc1  *      600 3905999 3905400  1.9G  c W95 FAT32 (LBA)


Command (m for help): m

Help:

      DOS (MBR)
       a   toggle a bootable flag
       b   edit nested BSD disklabel
       c   toggle the dos compatibility flag

      Generic
       d   delete a partition
       l   list known partition types
       n   add a new partition
       p   print the partition table
       t   change a partition type
       v   verify the partition table

      Misc
       m   print this menu
       u   change display/entry units
       x   extra functionality (experts only)

      Save & Exit
       w   write table to disk and exit
       q   quit without saving changes

      Create a new label
       g   create a new empty GPT partition table
       G   create a new empty SGI (IRIX) partition table
       o   create a new empty DOS partition table
       s   create a new empty Sun partition table


Command (m for help): q
Install SmartOS
To install SmartOS, you will need to use of the keyboard and monitor. Since our server is at Hetzner, we will use the Hetzner LARA system. It is best to schedule this in advance. If the computer does not boot from the USB stick, you will also need to change the boot settings in the BIOS.
Once connected to the remote KVM system (e.g., LARA), reboot the system. If the system boots from the USB stick after trying to boot from the network, then you have the desired configuration. If it does not try to boot from the network first, then Hetzner’s rescue system will not work for you if you need it in the future. If necessary, adjust the boot settings in the BIOS to boot from the network first and then the USB stick.
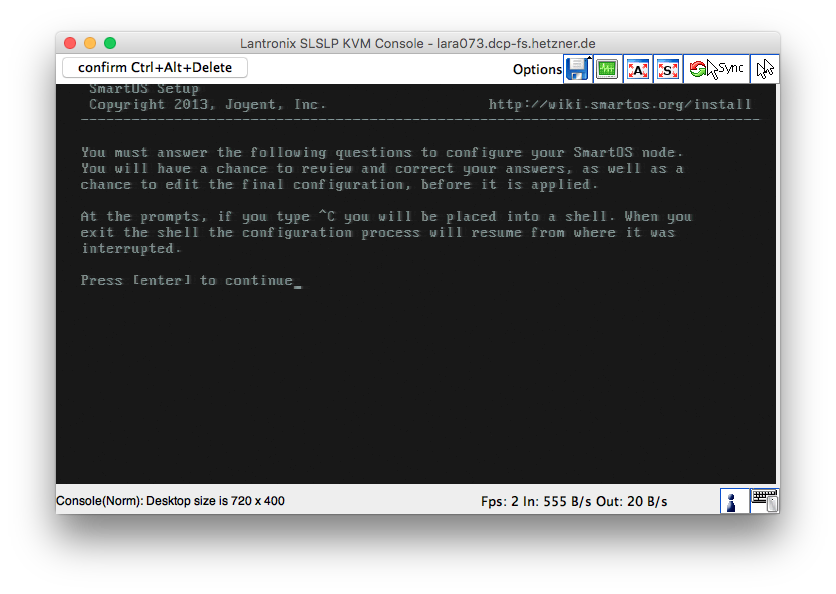
After booting from the USB stick you should see the SmartOS installer. Read the text. You must understand what options you are selecting.
Note
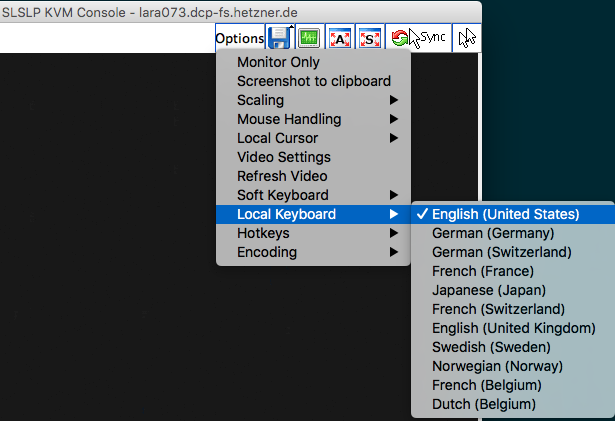
Keyboard Settings
If you notice that your keyboard is not entering text as you expect, check the keyboard settings of the KVM. On the Lantronix SLSLP KVM Console (LARA) at Hetzner, these settings are found in the Options menu.
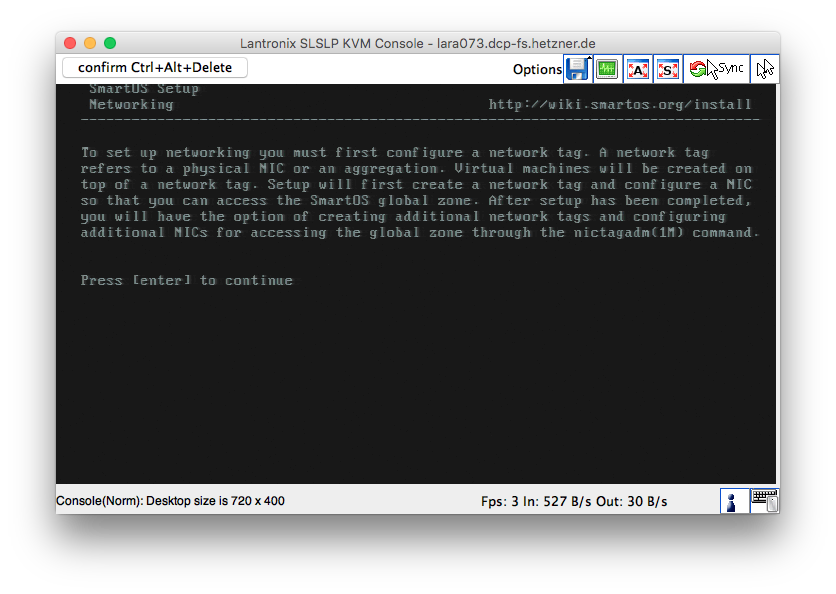
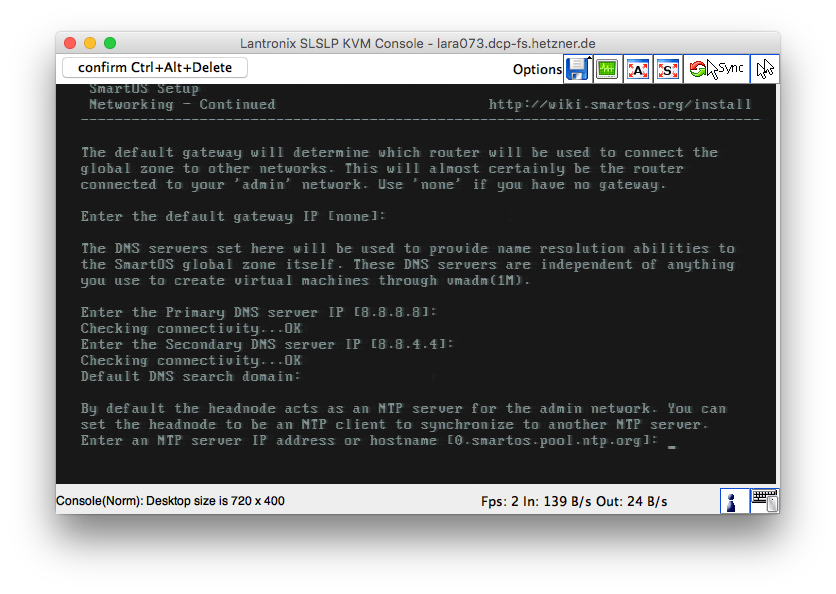
Configure a static IP address for the admin network. (Using DHCP will waste processor time and memory and possibly cause confusion.)
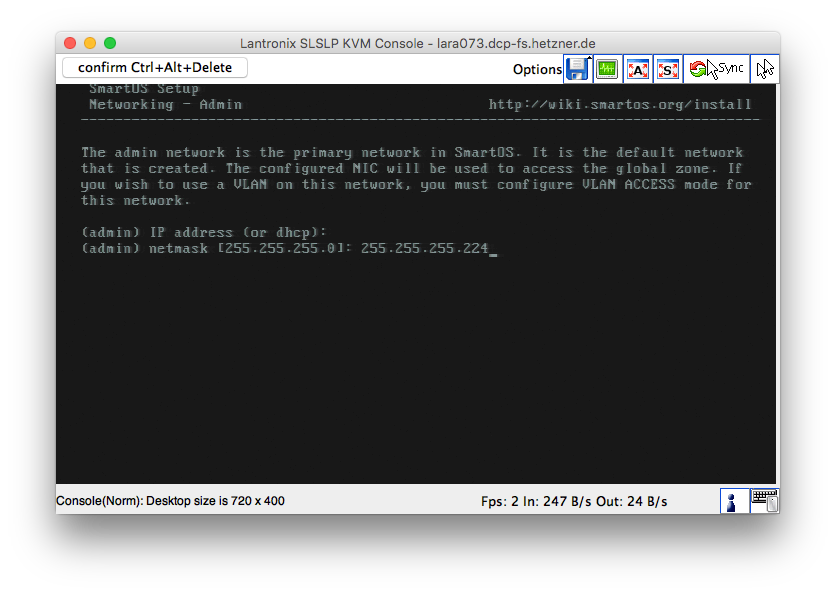
Next, configure the netmask, gateway, DNS servers and search domain. The
static IPv4 address, netmask and gateway are available in Hetzner’s robot
interface. Select the default NTP server (0.smartos.pool.ntp.org).
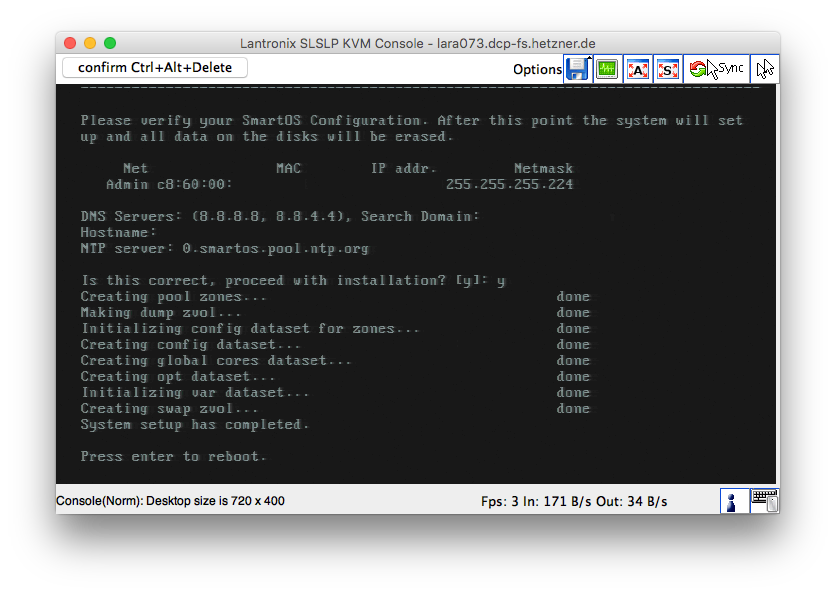
Unless you know ZFS well, use the default settings for storage.

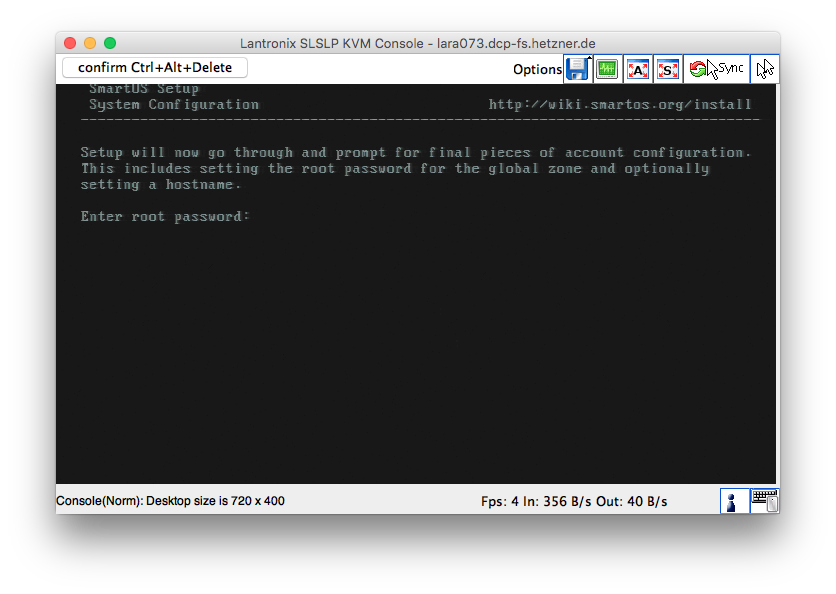
Set a strong root password. Because most KVM connections are not encrypted, we
will change the root password as soon as the system reboots and starts
sshd. Also, set the hostname.
Continue to complete the installation.
After the installation, if your boot hangs at the Hetzner Online GmbH - PXE Boot-System screen or you see a message about a Boot device, then you have an incorrect BIOS boot order.
Reboot and Select proper Boot device
or Insert Boot Media in selected Boot device and press a key
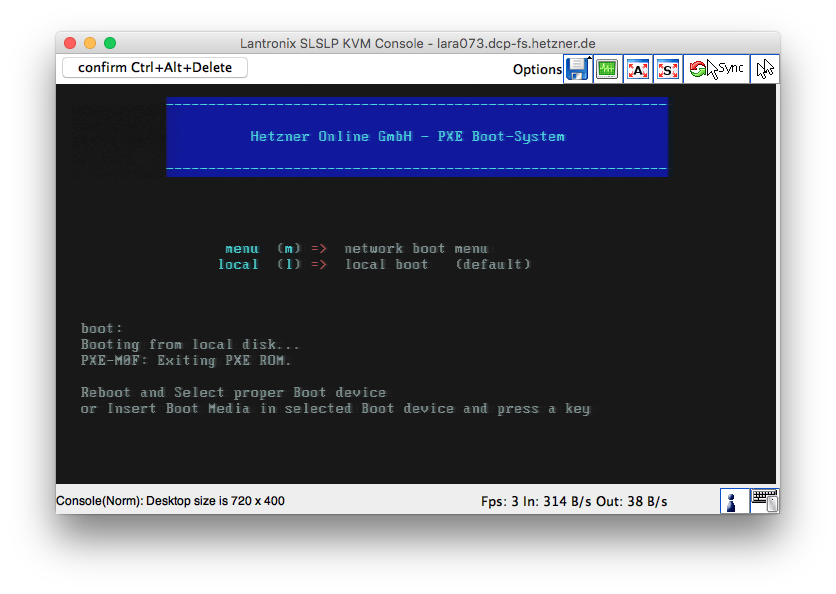
You need to boot from the USB stick. This order worked for us:
- Realtek Boot Agent
- ADATA USB Flash Drive 0.00
We did not use the UEFI: ADATA USB Flash Drive 0.00 option. It did not work on this system.

Post-Installation Configuration
After installation, two major tasks remain:
SmartOS uses a temporary global zone, so configuration is not as simple as on other *nix systems. Durable configuration changes must be made to the USB stick.
Changing the Root Password
To change the password for the root user in the global zone, we complete the following tasks:
- Unmount the
/etc/shadowfile.- Copy the
shadowfile from the USB stick to/etc/shadow.- Update the password.
- Copy the updated
/etc/shadowfile back to the USB stick.
The following command line, run as the root user, will complete these
tasks:
[root@smartos ~]# umount /etc/shadow; cp /usbkey/shadow /etc/shadow; passwd root; cp /etc/shadow /usbkey/shadow
New Password:
Re-enter new Password:
passwd: password successfully changed for root
SSH Authentication With Public Keys
Using public-key authentication for sshd is slightly more complex. We need
to complete the following steps:
- If we do not have keypair to use with SSH, create a keypair.
- Add our public key to
authorized_keys.- Log in with our SSH keypair.
- Change the
sshdserver to require public-key authentication.
To create a keypair, search for appropriate documentation
<https://www.google.com/search?q=generate+ssh+key>. Use a strong passphrase.
Anyone with the private key and the passphrase can log in to the server as the
root user. Note that you need to keep the private key (e.g., id_rsa)
on your computer. The public key (e.g., id_rsa.pub) should be added to
authorized_keys files on servers you access.
Create a text file with your public key. Create the /usbkey/config.inc
directory. Use cat to copy your public key into the
/usbkey/config.inc/authorized_keys file. Press CTRL+D when you are
finished pasting your public key. Do not paste the public key in the example
below, as you do not have the corresponding private key.
[root@smartos ~]# mkdir /usbkey/config.inc
[root@smartos ~]# cat > /usbkey/config.inc/authorized_keys
ssh-rsa AAAAB3NzaC1yc2EAAAADAQABAAABAQDWhp4iFEn5wTacDG/U6znfQx1LcwJFbeqalIGDZuAlvzsS/ZI6DKa2EJ2thbOVh4IdyW+Wzw2Vr4bVTVRp2KM4NPgXZBZv6w0YsE4M4mNk6415TWGg5CKLnsBCShz0ssN0niQDPIHjm/sIH7pXpZ95eI0DrDVCdIeSb5fx/ua43P4kuhikccxSZl6isE//sAfVc93BzEvp7TRCGFlJP2K52oMMUapAb61JHcqbMppIR9h8eipppxhOks7M/BhM2qQKj3C/kfwpWlV8GsqXxU41dGNWPtSFbJ4h4sXQF+azbFwGsUmxKezUu2WNbaXsRAOjQfMaQ7krdrlB241fT5Tb user@host
Next, update the /usbkey/config file to use your new /usbkey/config.inc/authorized_keys file by adding this line:
root_authorized_keys_file=authorized_keys
You can do this with cat:
[root@smartos ~]# cat >> /usbkey/config

root_authorized_keys_file=authorized_keys
Next, reboot the server. This will show that the authorized_keys file is
being used when the system recreates the global zone on boot.
[root@smartos ~]# reboot
Now, verify that you can log in to SSH using your new key pair. If that worked, then you can move on to requiring public-key authentication for all SSH connections.
You’ll need to change two settings in /usbkey/ssh/sshd_config:
PasswordAuthenticationshould beno.ChallengeResponseAuthenticationshould beno.
Here’s a diff:
--- sshd_config
+++ sshd_config
@@ -73,11 +73,11 @@
 #IgnoreRhosts yes

 # To disable tunneled clear text passwords, change to no here!
-PasswordAuthentication yes
+PasswordAuthentication no
 PermitEmptyPasswords no

 # Change to no to disable s/key passwords
-#ChallengeResponseAuthentication yes
+ChallengeResponseAuthentication no

 # Kerberos options
 #KerberosAuthentication no
After you make this change, reboot (again) and pray that you can connect with
SSH. If you are to connect and authenticate, you have successfully configured
SmartOS. Congratulations. If not, and you are unable to connect, you may have
to use a remote KVM session to access the system. Remember to change your
root user password after you use it over KVM.